

Wait! Before You Go…
Let Aviox Technologies give your idea the edge it deserves — with a free:
- 🚀 Smart Project Blueprint
- 💰 Accurate Cost & Resource Estimate
- 📅 Launch Timeline Strategy

Welcome to our guide on creating Laravel API authentication using Passport! In today’s digital landscape, securing API endpoints and authenticating users is paramount for ensuring data privacy and system integrity. Laravel’s Passport package provides a robust solution for implementing OAuth2 authentication in your Laravel applications, offering a seamless way to authenticate API requests and manage access tokens. Whether you’re building a RESTful API for mobile apps, web services, or other integrations, this tutorial will walk you through the process of setting up Laravel Passport for secure and efficient API authentication. Let’s dive in and explore how to leverage Passport to enhance the security and usability of your Laravel-powered APIs.
Step 1: Install Laravel 8 for REST API with Passport Authentication
In this step, we will create laravel 8 application using the below command.
composer create-project –prefer-dist laravel/laravel REST_API
Now, We are required to install the passport via the composer package manager. So, in your terminal run the below command.
composer require Laravel/passport
After installation of the package, We are required to get default migration to create new passport tables in our database. So, run the below command.
php artisan migrate
Now, We will install the passport using the passport:install command. which will create token keys for security.
php artisan passport:install
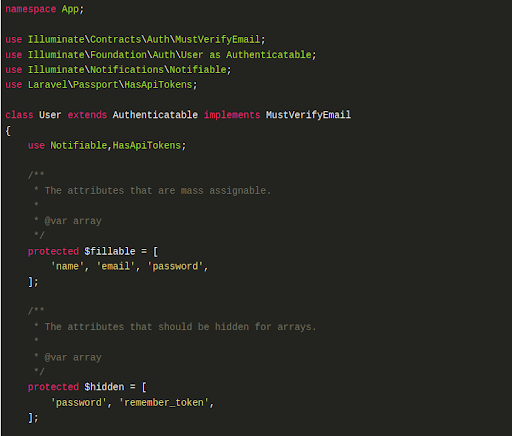
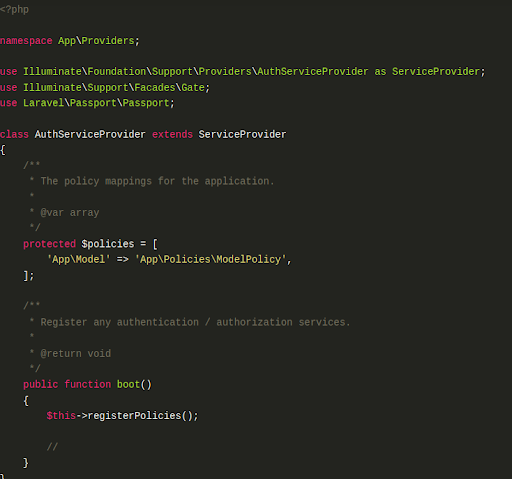
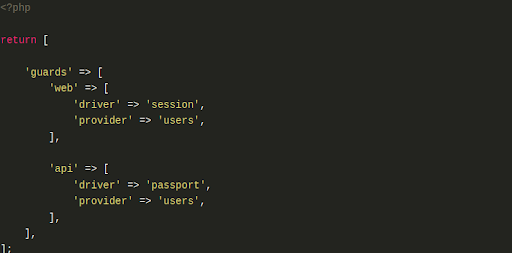
Now, We have to configure the model, service provider, and auth config file.
Add the below code in app/User.php
Add the below code in the app/Providers/AuthServiceProvider.php
In config/auth.php add the below code.
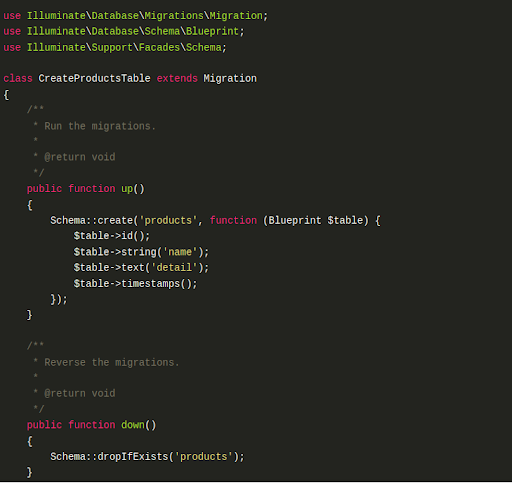
In this step, We will create migration of the Product table using the PHP artisan command. So, run the below command in your terminal.
php artisan make:migration create_products_table
After running the above command, you will find migration in this path database/migrations. So, add the below code in your migration file to create the products table.
Now, run the below code in the terminal to create a migration.
php artisan migrate
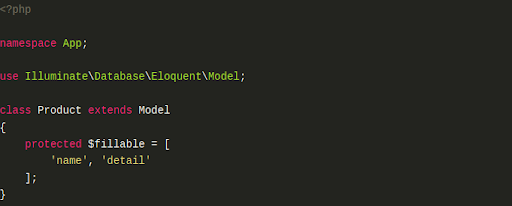
And add the below code in the app/Product.php file
In this step, we will create API routes. Laravel provides an api.php file for writing web services routes. So, let’s add a route in the routes/api.php file.

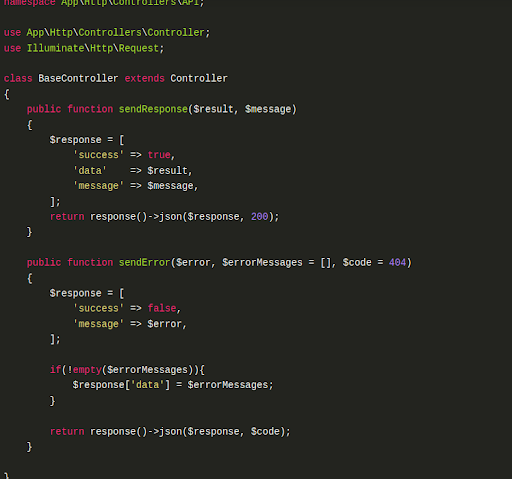
Now, I have created BaseController, ProductController, and RegisterController in API folder.
app/Http/Controllers/API/BaseController.php
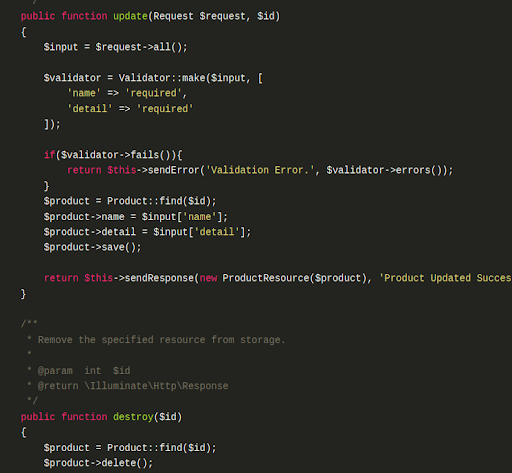
app/Http/Controllers/API/ProductController.php


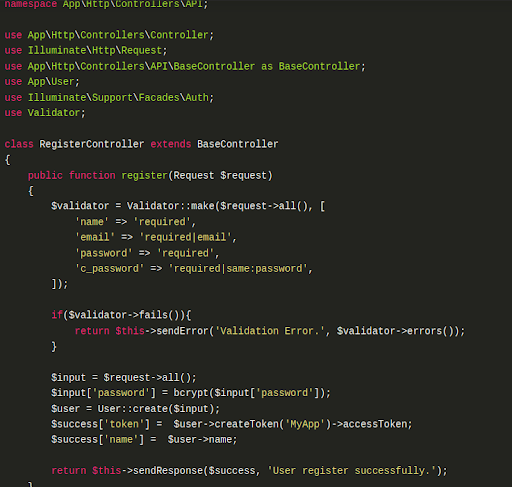
app/Http/Controllers/API/RegisterController.php

Now, I have used POSTMAN API for testing purposes, Postman is a collaboration platform for API development. Postman’s features simplify each step of building an API and streamline collaboration so you can create better APIs—faster.
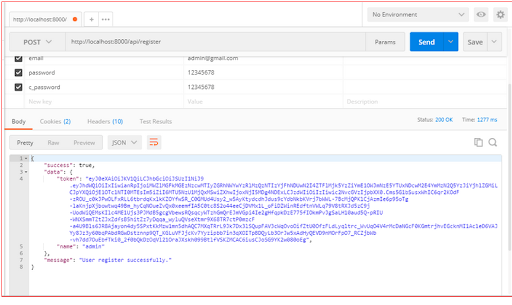
Here I have added some screenshots with descriptions of the postman for your better understanding. First of all, we need to register in postman to check our example.
1 – Register API: Verb:GET, URL:http://localhost:8000/api/register
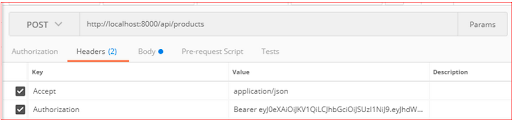
2 – After successfully registering in postman we need to add an access token in headers.
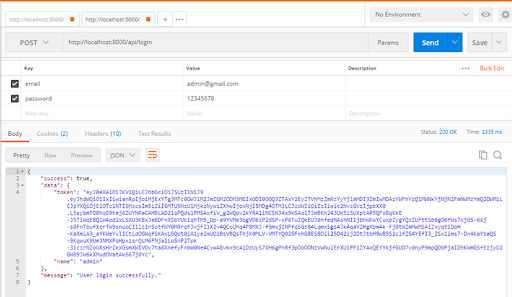
3 – Login API: Verb:GET, URL:http://localhost:8000/api/login


Get In touch
Our Testimonials:


Let Aviox Technologies give your idea the edge it deserves — with a free: