 Python Development
 PHP Development
 React Js Development
 Vue Js Development
 Node Js Development
 Angular Development
 Continuous Integration
 Automated Deployment
 Monitoring and Logging
 Security Integration
 Backup and Recovery Automation
 Collaborative Tools Integration
 RPA Strategy and Roadmap
 RPA Tool Selection
 RPA Bot Development
 RPA Maintenance and Support
 Custom RPA Solution
 RPA Vendor Assessment
 AWS Lambda
 Amazon DynamoDB
 AWS CloudFormation
 Azure Deployment
 DNS Mapping
 Data Visualization
 Big Data Processing
 Data Modeling
 Database Administration
 Cloud Data Services
 Data Migration
 ETL Orchestration
 Data Collaboration
 Responsive Web Design
 Web Redesigning
 Mobile App Design
 UI/UX Design
 Wordpress Theme Design
 Online Portfolio Design
 SEO
SEO SMO
SMO PPC
PPC ORM
ORMStep 1: Install Laravel 8 for REST API with Passport Authentication
In this step, we will create laravel 8 application using the below command.
composer create-project –prefer-dist laravel/laravel REST_API
Step 2: Install Passport
Now, We are required to install the passport via the composer package manager. So, in your terminal run the below command.
composer require laravel/passport
After installation of the package, We are required to get default migration to create new passport tables in our database. So, run the below command.
php artisan migrate
Now, We will install the passport using the passport:install command. which will create token keys for security.
php artisan passport:install
Step 3: Passport Configuration
Now, We have to configure the model, service provider, and auth config file.
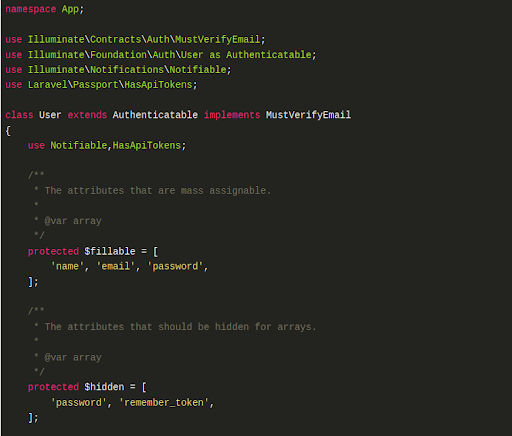
- HasApiTokens class of Passport has been added in the User model,
Add the below code in app/User.php
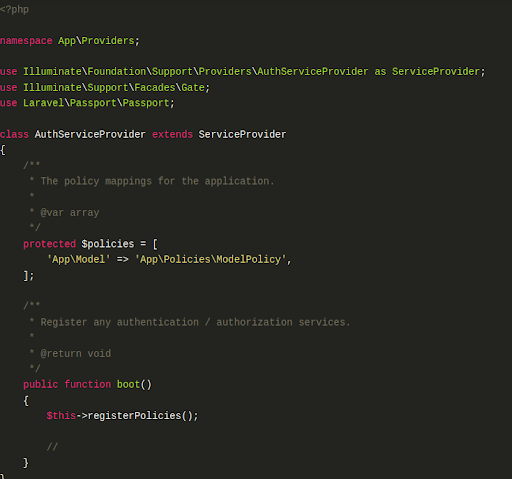
- In AuthServiceProvider we have added “Passport::routes()”
Add the below code in the app/Providers/AuthServiceProvider.php
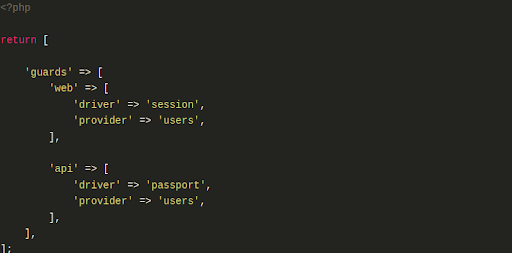
- We have added API auth configuration in the auth.php file.
In config/auth.php add the below code.
Step 4: Add Table and Model
In this step, We will create migration of the Product table using the PHP artisan command. So, run the below command in your terminal.
php artisan make:migration create_products_table
After running the above command, you will find migration in this path database/migrations. So, add the below code in your migration file to create the products table.
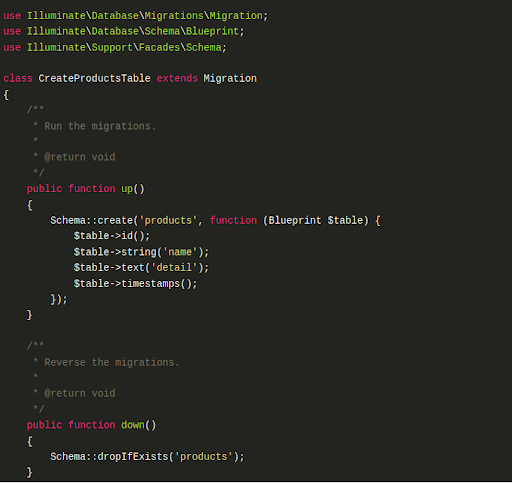
Now, run the below code in the terminal to create a migration.
php artisan migrate
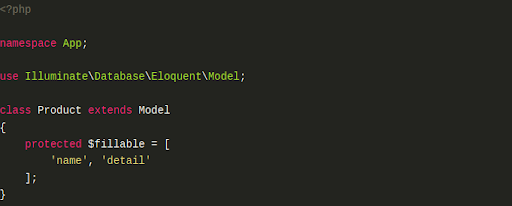
And add the below code in the app/Product.php file
Step 5: Create API Routes
In this step, we will create API routes. Laravel provides an api.php file for writing web services routes. So, let’s add a route in the routes/api.php file.

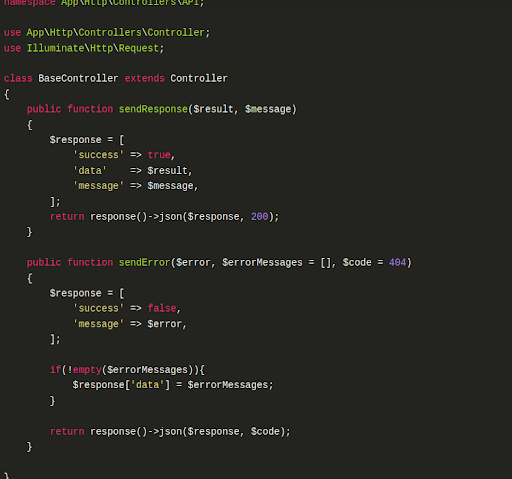
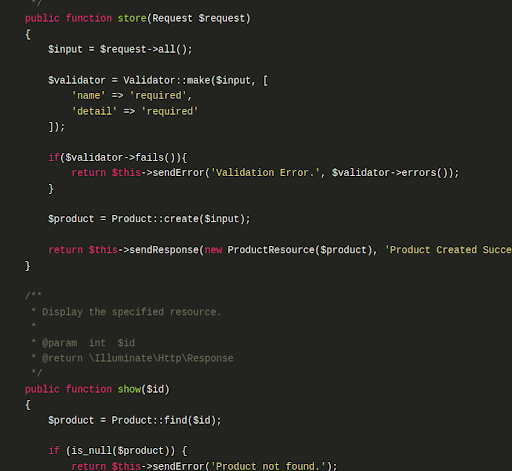
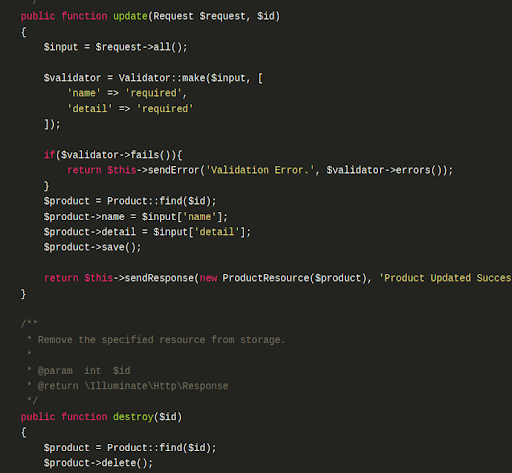
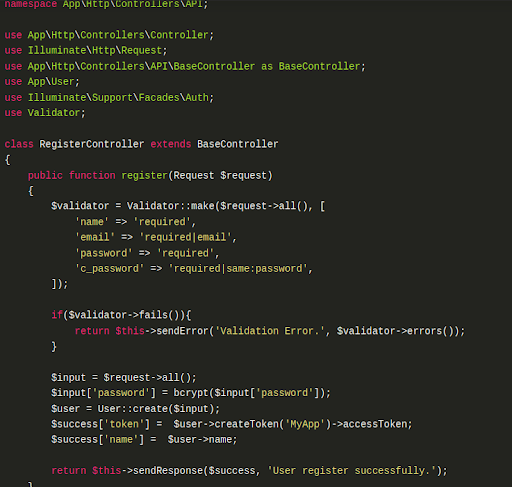
Step 6: Create Controller
Now, I have created BaseController, ProductController, and RegisterController in API folder.
app/Http/Controllers/API/BaseController.php
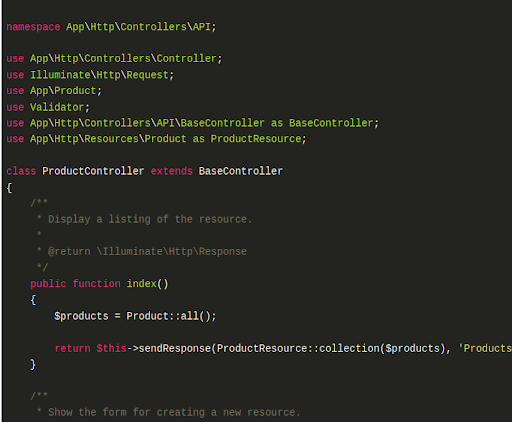
app/Http/Controllers/API/ProductController.php
app/Http/Controllers/API/RegisterController.php

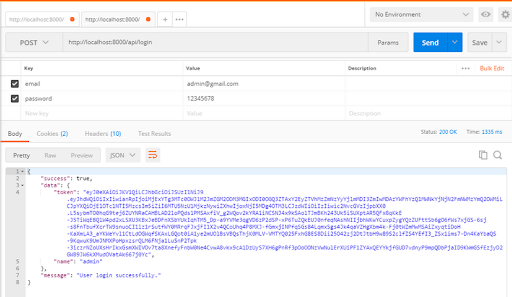
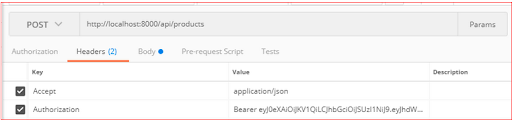
Now, I have used POSTMAN API for testing purposes, Postman is a collaboration platform for API development. Postman’s features simplify each step of building an API and streamline collaboration so you can create better APIs—faster.
Here I have added some screenshots with descriptions of the postman for your better understanding. First of all, we need to register in postman to check our example.
1 – Register API: Verb:GET, URL:http://localhost:8000/api/register

2 – After successfully registering in postman we need to add an access token in headers.
3 – Login API: Verb:GET, URL:http://localhost:8000/api/login