 Python Development
 PHP Development
 React Js Development
 Vue Js Development
 Node Js Development
 Angular Development
 Continuous Integration
 Automated Deployment
 Monitoring and Logging
 Security Integration
 Backup and Recovery Automation
 Collaborative Tools Integration
 RPA Strategy and Roadmap
 RPA Tool Selection
 RPA Bot Development
 RPA Maintenance and Support
 Custom RPA Solution
 RPA Vendor Assessment
 AWS Lambda
 Amazon DynamoDB
 AWS CloudFormation
 Azure Deployment
 DNS Mapping
 Data Visualization
 Big Data Processing
 Data Modeling
 Database Administration
 Cloud Data Services
 Data Migration
 ETL Orchestration
 Data Collaboration
 Responsive Web Design
 Web Redesigning
 Mobile App Design
 UI/UX Design
 Wordpress Theme Design
 Online Portfolio Design
 SEO
SEO SMO
SMO PPC
PPC ORM
ORMIntroduction
Here you will learn how to install laravel on any dedicated server .
Step 1 Buy domain name and hosting
First you have to buy domain name and hosting . There are many hosting provider available.
Step 2 Login to your hosting
After you buying the hosting , you will search for cpanel option and find SSH option. To connect the SSH you need to HOST, USERNAME and PASSWORD,
Step 3 Install php
Now in this step we are adding PHP PPA. I am installing php 8 here. Using following command to install PHP 8.1.
$ sudo apt install software-properties-common
$ sudo add-apt-repository ppa:ondrej/php
$ sudo apt update
$ sudo apt install php8.1
Step 4 Install php 8.x Extensions
After installing php now we have to install php extensions by using these commands.
$ sudo apt install php8.1-common php8.1-mysql php8.1-xml php8.1-xmlrpc php8.1-curl php8.1-gd php8.1-imagick php8.1-cli php8.1-dev php8.1-imap php8.1-mbstring php8.1-opcache php8.1-soap php8.1-zip php8.1-redis php8.1-intl -y
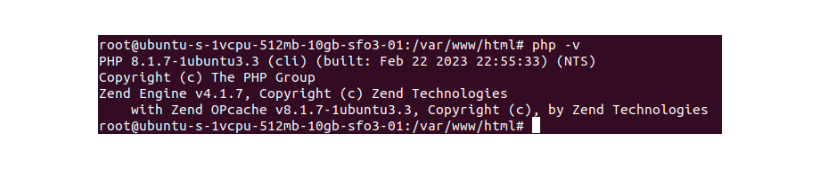
Step 5 Check php version
Now we are going to verify php version.
$ sudo php -v
Step 6 Install composer
To install composer you have to run these 4 commands
$ php -r “copy(‘https://getcomposer.org/installer’, ‘composer-setup.php’);”
$ php -r “if (hash_file(‘SHA384’, ‘composer-setup.php’) === ‘544e09ee996cdf60ece3804abc52599c22b1f40f4323403c44d44fdfdd586475ca9813a858088ffbc1f233e9b180f061’) { echo ‘Installer verified’; } else { echo ‘Installer corrupt’; unlink(‘composer-setup.php’); } echo PHP_EOL;”
$ php composer-setup.php
$ php -r “unlink(‘composer-setup.php’);”
Step 7 Composer configuration
After run these commands composer will install and you can verify it by run
$ composer –version
Output will be this

Step 8 Install mysql database
Configure MySQLPPA
MySQL provides an APT repository for install MySQL server and tools. You need to add this MySQL repository to your system’s package source list.
First of all download the repository package using the wget command:
$ wget -c https://repo.mysql.com//mysql-apt-config_0.8.13-1_all.deb
then install MySQL repository package by using dpkg command:
$ sudo dpkg -i mysql-apt-config_0.8.13-1_all.deb
Install MySQL
Execute the following command to install MySQL:
$ sudo apt-get install mysql-server
It will prompt for the root‘s password. Enter a secure password and continue.
Secure MySQL server installation
Execute the following command to adjust security to the MySQL Server:
$ sudo mysql_secure_installation
It will prompt you some security options that you should choose in order to secure the MySQL server:
- Remove anonymous users? (Press y|Y for Yes, any other key for No) : y
- Disallow root login remotely? (Press y|Y for Yes, any other key for No) : y
- Remove test database and access to it? (Press y|Y for Yes, any other key for No) : y
- Reload privilege tables now? (Press y|Y for Yes, any other key for No) : y
#### Manage MySQL Server via Systemd
Typically, MySQL service is automatically started once the package is configured. To check whether MySQL is running or not:
$ sudo systemctl status mysql
If not start then you can use the following command to start it:
$ sudo systemctl enable mysql
Connect to MySQL server
To connect to the MySQL Server, use this command:
$ sudo mysql -u root -p
After run command if will ask for password , enter password and following terminal is opened
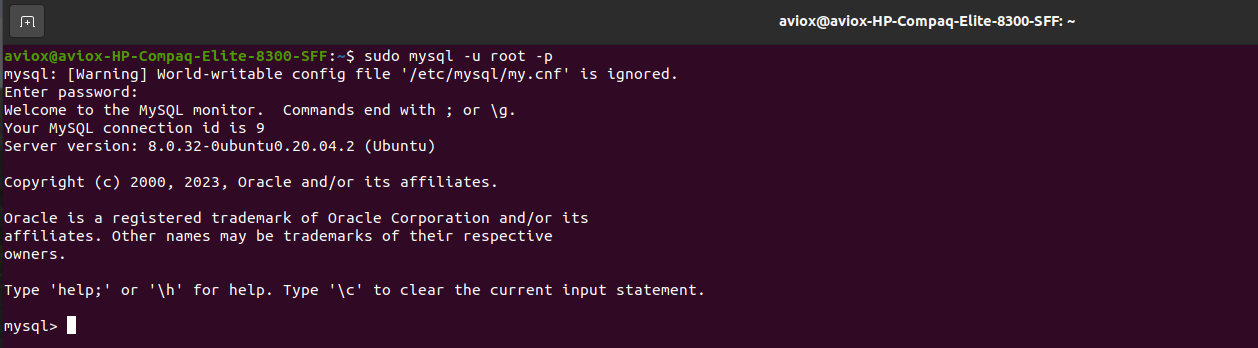
To show all databases
mysql> show databases;
Step 9 Install fresh laravel
To install new setup for laravel project , you have to run this command
composer create-project –prefer-dist laravel/laravel laravel-blog
It will installed fresh laravel 9 setup .
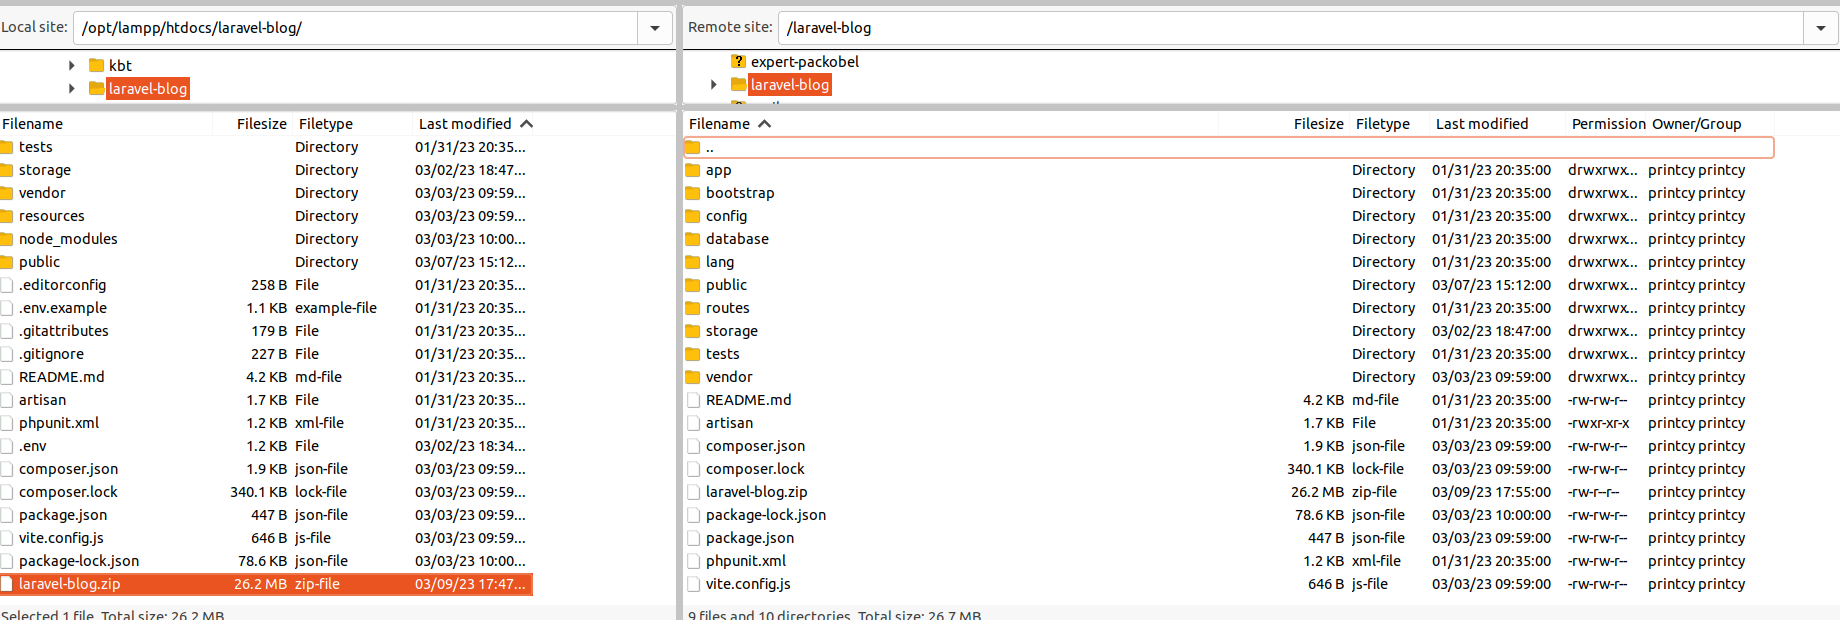
Step 10 Upload local setup on server
If you have already made laravel project on local , then you have to made zip and upload it on server by FTP.
Create a new folder in public_html , rename it as your project’s zip name like laravel-blog
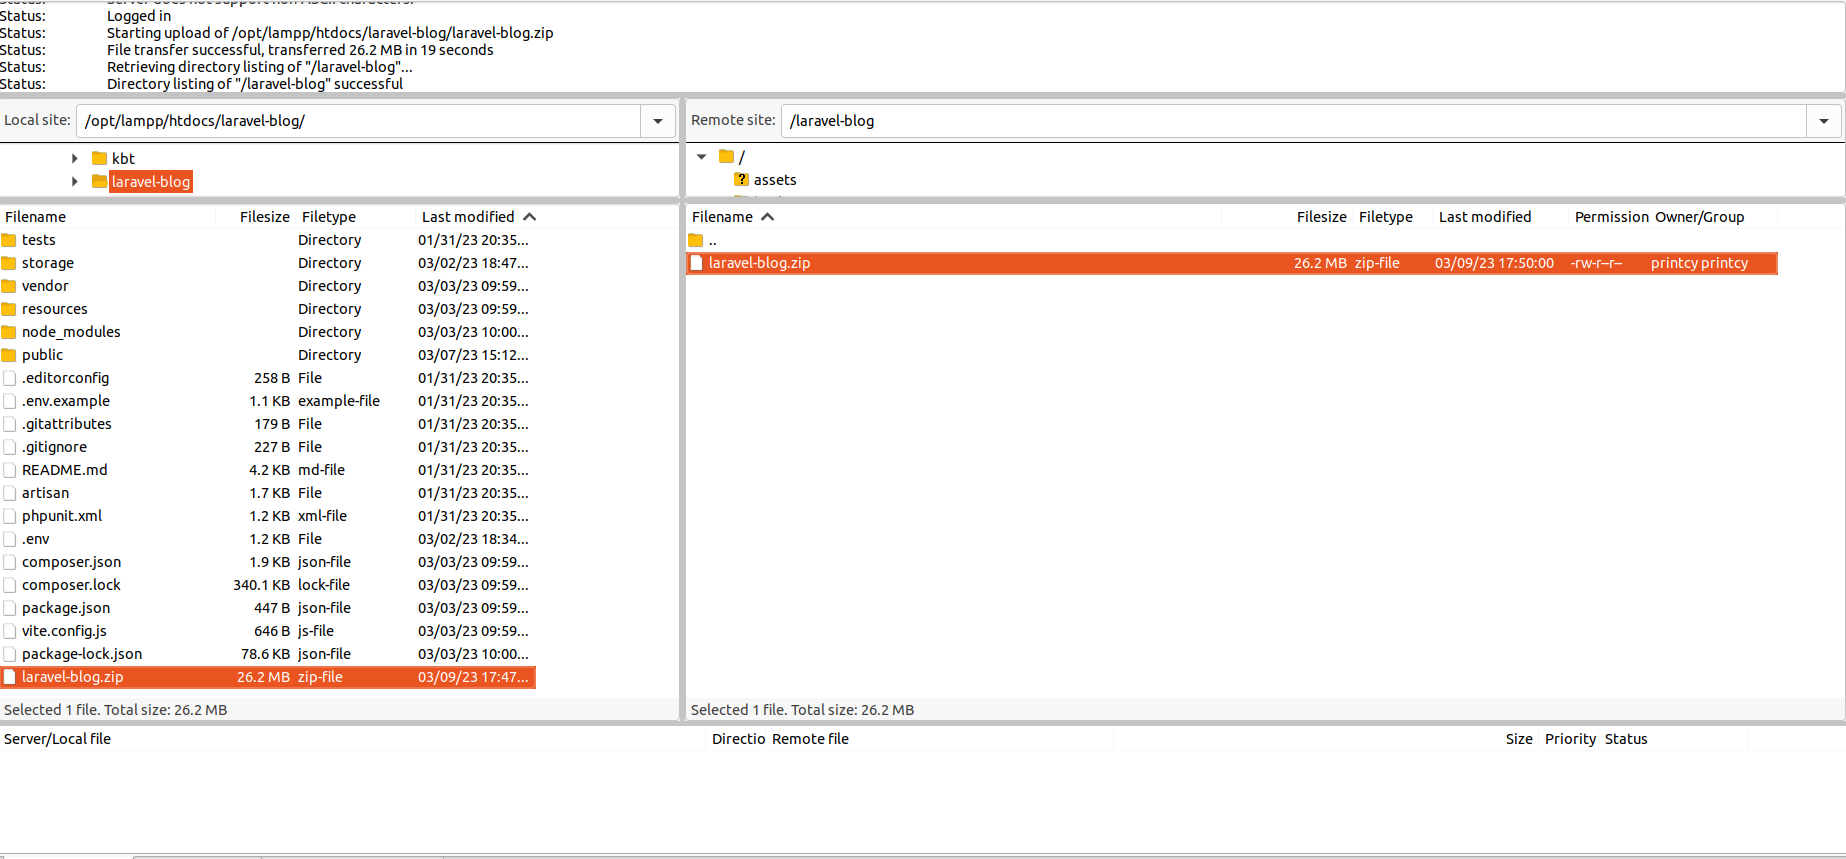
and then unzip steup by using this command-:
$ unzip laravel-blog.zip
Step 11 Setup .htcccess file
Now when you hit domain like www.laravel-blog.com it will show HTTP Error 403 — Forbidden error. To fix this , you have to create the .htaccess file in your public_html folder and add these line in it .
RewriteEngine On
RewriteCond %{REQUEST_URI} !^blog
RewriteRule ^(.*)$ laravel-blog/$1 [L]
In case your project name is different then you can replace ‘blog’ with your own project name.
Step 12 Run migration and create table
Now Update the DB credentials in .env file in project folder.
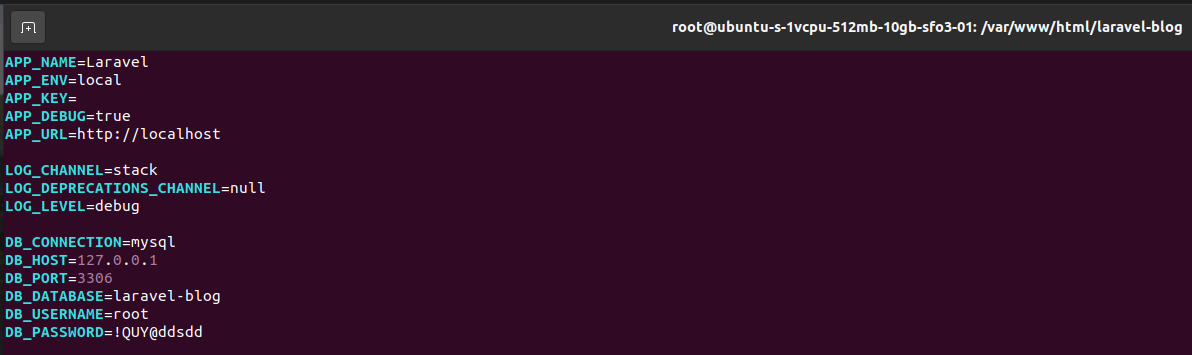
After that run command
$ php artisan migrate
It will create tables in database .