 Python Development
 PHP Development
 React Js Development
 Vue Js Development
 Node Js Development
 Angular Development
 Continuous Integration
 Automated Deployment
 Monitoring and Logging
 Security Integration
 Backup and Recovery Automation
 Collaborative Tools Integration
 RPA Strategy and Roadmap
 RPA Tool Selection
 RPA Bot Development
 RPA Maintenance and Support
 Custom RPA Solution
 RPA Vendor Assessment
 AWS Lambda
 Amazon DynamoDB
 AWS CloudFormation
 Azure Deployment
 DNS Mapping
 Data Visualization
 Big Data Processing
 Data Modeling
 Database Administration
 Cloud Data Services
 Data Migration
 ETL Orchestration
 Data Collaboration
 Responsive Web Design
 Web Redesigning
 Mobile App Design
 UI/UX Design
 Wordpress Theme Design
 Online Portfolio Design
 SEO
SEO SMO
SMO PPC
PPC ORM
ORM
Create custom plugin in wordpress
Introduction
Today we learn how we create custom plugin in wordpress. In previous tutorials i already explain about wordpress ,themes and plugins. Every WordPress site needs a theme to pull content from the database and display that in a design. And theoretically you could run a site with just a theme and nothing else. But that site would be very limited without the addition of plugins.
Plugins add extra functionality to your WordPress site over and above what comes with WordPress core. Everything from a booking calendar or animated slider to a full-featured learning management system or online marketplace—you can add them all to your site with plugins.
In this guide, I’ll show you how to create your own WordPress plugin. I’ll show you how to use best practice in plugin development, how to get the code in your plugin to run, and how to structure your plugin’s code and files. I’ll also walk you through the process of creating your simple first plugin.
Free and Paid WordPress Plugins
If you want to add some specific features to your website, there are plenty of places you can buy or download plugins. The WordPress plugin directory includes thousands of free plugins that’ll help you create the site you need. But if you’re looking for more advanced features, a better user interface, or improved support, it’s worth buying premium plugins from various site available. You can easily buy7 , install and use in your website.
But sometimes you might need to code your own plugin! This can be more efficient than using a third-party plugin, as you might only need a part of the code provided by those. It also means you can develop a plugin that meets your needs more precisely, or you can customise an existing plugin to adapt it for your site.
Step 1. Creating Your First WordPress Plugin
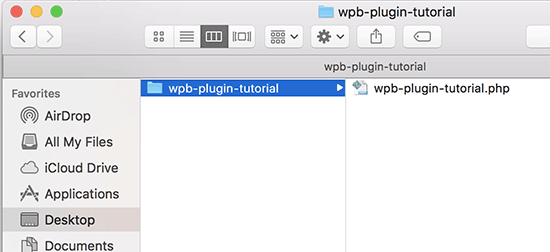
The first step is to create a new folder on your desktop or documents folder, and name it something like wpb-plugin-tutorial.
Next, you need to create a new file in your text editor and save it inside your plugin folder as wpb-plugin-tutorial.php or my-first-plugin.php. The important thing is the .php extension, but you can name the file what you wish.
You’ll need to open that PHP file with your text editor. The first thing you need to add to your plugin file is the plugin header. This comment block simply tells WordPress the name of your plugin, version, website, plugin author name, and more.
<?php / Plugin Name: WPBeginner Plugin Tutorial Plugin URI: https://www.wpbeginner.com Description: A short little description of the plugin. It will be displayed on the Plugins page in WordPress admin area. Version: 1.0 Author: WPBeginner Author URI: https://www.wpbeginner.com License: GPL2 License URI: https://www.gnu.org/licenses/gpl-2.0.html Text Domain: wpb-tutorial Domain Path: /languages /
After adding the plugin header, you can start adding the plugin code below it.
Mac users can right click on the folder and select ‘Compress wpb-plugin-tutorial’. Windows users can right click on the folder and select Send to » Compressed (zipped) folder.

Step 2. Set Up a Testing Environment
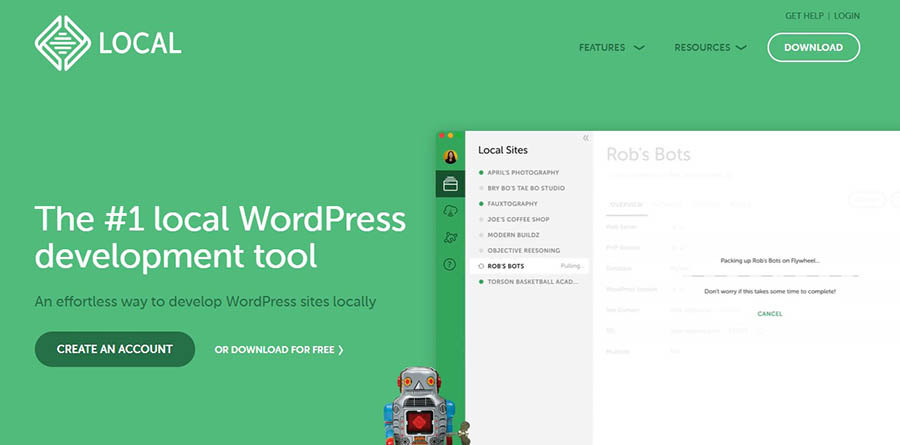
The next step is to set up a testing environment.You are likely to learn a lot along the way and you wouldn’t want to experiment on an active site. A local environment or staging site will enable you to test your plugin privately as you work on it.
You can use Local to create a WordPress site on your computer:
You can also create an online staging environment. You can make a copy of your existing site. This way, you can test your plugin without breaking your site or interrupting your visitors.
Step 3. Create the Plugin File
Once you have your staging environment set up, it’s time to create your plugin. The first step is to create a folder for it in your site’s directory.
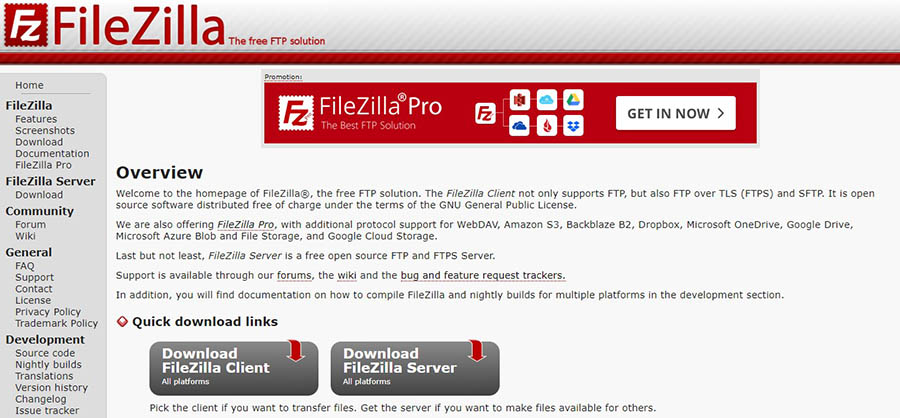
You can use a Secure File Transfer Protocol (SFTP) client like FileZilla to access your site’s files and folders:
If this is your first time using FileZilla, you’ll need to enter your credentials, including your username and password. You can get this information from your hosting account.
Once you’ve connected to your site’s directory, navigate to wp-content/plugins and create a new folder for your plugin:
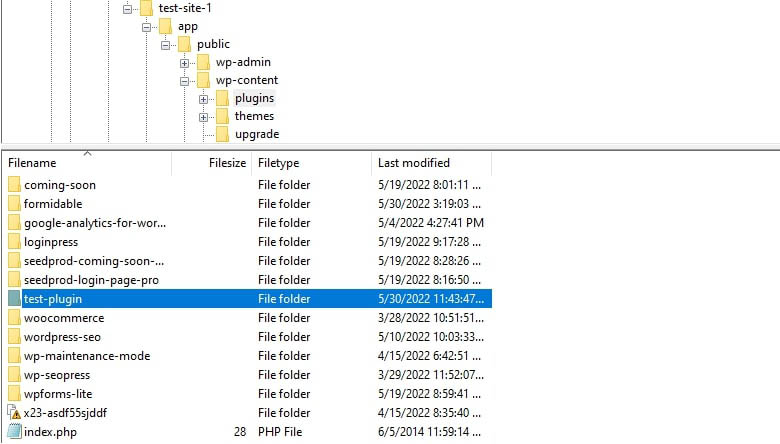
Next, you’ll need to create a PHP file to add to this folder. To do this, open your preferred text editor and enter the following information:
<?php / * Plugin Name: test-plugin * Plugin URI: https://www.your-site.com/ * Description: Test. * Version: 0.1 * Author: your-name * Author URI: https://www.your-site.com/ /
You’ll need to change the above information to match your details. When you’re ready, you can save your file. Remember to use the file extension php (e.g., my-first-plugin.php).
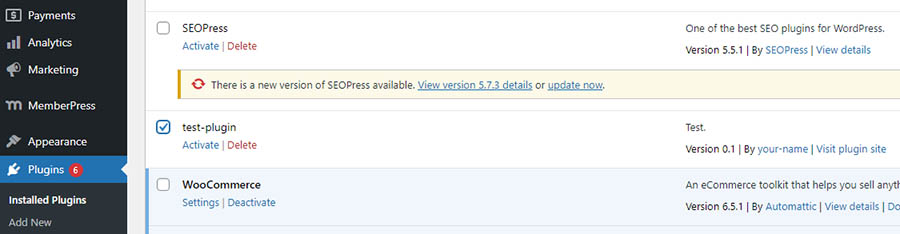
Then, you’ll need to upload this file to the plugin folder that you created earlier. Once you’ve done this, navigate to your test site’s WordPress dashboard and go to the Plugins page. Here, you should be able to see your new plugin.
Step 4. Add Code to your plugin
Every plugin is different. However, they all share common components. For instance, all plugins use hooks to interact with WordPress.
A hook is how a plugin connects to the pre-existing code of WordPress core’s programming.Hooks are an important part of WordPress development.
There are two types of hooks that you will need to consider when creating your plugin:
Actions: These add or change WordPress functionality and make up the majority of hooks.
Filters: These are used to modify the functionality of actions.
we’ll use the following code as an example:
function modify_read_more_link() { return ‘Click to Read!‘; } add_filter( ‘the_content_more_link’, ‘modify_read_more_link’ );
You can also add this code to your theme’s functions.php file. This file contains code that adds functionality to your site, and works in a way that is very similarl to how a plugin does.
Step 5: Test & Install Your Plugin
As you continue developing your plugin, it’s important that you save your work often and test your changes on your staging site. You’ll also want to keep an eye out for any security issues, so you can resolve them before publishing your plugin.
Once you’re satisfied with your plugin, you should try it on a live site. Again, you’ll want to make sure that you have thoroughly tested your plugin for any bugs and vulnerabilities.
It’s also a good idea to create a backup of your live site before testing your plugin on it. This way, if anything does go wrong, you can restore your content.
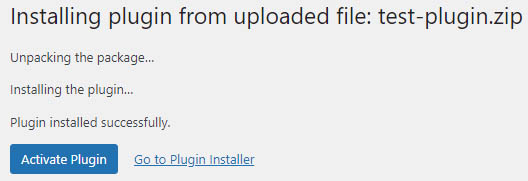
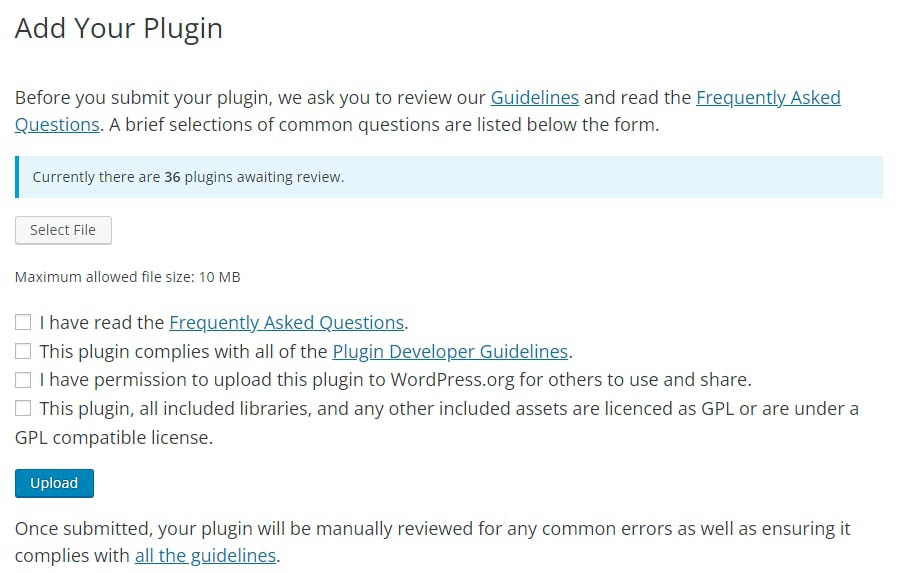
To install your plugin on a WordPress site, simply navigate to the Plugins page on your dashboard and select Add New. Next, click on Upload Plugin and you’ll be prompted to choose a .zip file to upload to your site:
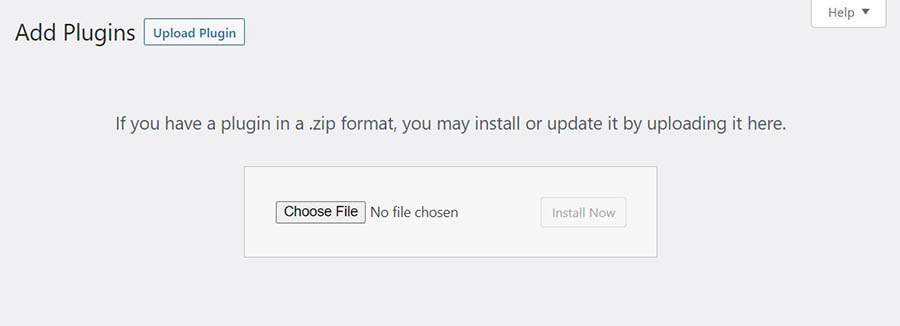
Simply select the compressed file and select Install Now. WordPress will then unpack and install the plugin on your site:
Step 6: Distribute Your Plugin
Once you’ve created and tested your plugin, you can start distributing it. Let’s look at the best ways to do this.
- Publish Your Work on the WordPress Plugin Directory
 Once your plugin is approved, you’ll need to add your files to the SVN directory. Then, WordPress users will be able to install your plugin on their sites.