 Python Development
 PHP Development
 React Js Development
 Vue Js Development
 Node Js Development
 Angular Development
 Continuous Integration
 Automated Deployment
 Monitoring and Logging
 Security Integration
 Backup and Recovery Automation
 Collaborative Tools Integration
 RPA Strategy and Roadmap
 RPA Tool Selection
 RPA Bot Development
 RPA Maintenance and Support
 Custom RPA Solution
 RPA Vendor Assessment
 AWS Lambda
 Amazon DynamoDB
 AWS CloudFormation
 Azure Deployment
 DNS Mapping
 Data Visualization
 Big Data Processing
 Data Modeling
 Database Administration
 Cloud Data Services
 Data Migration
 ETL Orchestration
 Data Collaboration
 Responsive Web Design
 Web Redesigning
 Mobile App Design
 UI/UX Design
 Wordpress Theme Design
 Online Portfolio Design
 SEO
SEO SMO
SMO PPC
PPC ORM
ORM
Introduction
In this tutorial we will use signals in our django application.Django signals are a way for different parts of a Django application to talk to each other by sending and receiving messages when certain events happen. This helps keep the code organized and modular.
Prerequisites:
You need following things to start work:
- Python3 installed
- Postgresql installed
- Django installed
Step 1 — Create a virtual environment to isolate your app dependencies. On windows machine, you can install virtualenv module to create virtual environment and on linux, you can use venv module. I am using venv to create a virtual environment on my linux machine.
$ python -m venv venv/
Step 2 – A folder named venv will be created on the location where you run above command. Let’s activate the environment:
$ source venv/bin/activate
Step 3 – Now that you are inside your virtual environment, let’s install dependencies that are required for this project:
$ pip install django psycopg2-binary
Django is the framework that you will be using to develop your web app using python and psycopg2-binary is the python module which works as a adapter between postgresql and django.
Step 4 – In this step, you will start a new django project by using following command.
$ django-admin startproject myproject
Step 5- First enter your project directory and start a new django application by following command
$ python manage.py startapp myapp
In next step we will install djangorestframework to use rest framework in our project
Step 6- Install djangorestframework using this command
$ pip install djangorestframework
Now your project directory should look like this:
Step 7 – To test your application locally, First enter your project directory and run the server using following commands.
$ cd myproject
$ python manage.py runserver
Step 8 – Navigate to http://localhost:8000/ to view the Django welcome screen. It should look like as shown in image:
Kill the server once done by pressing ctrl+z.
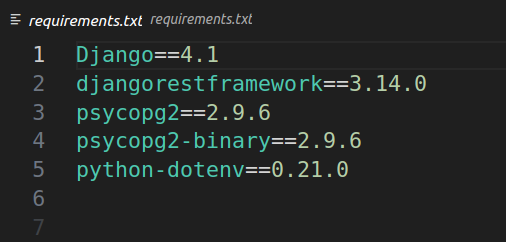
Step 9 – Now, you will create a requirements.txt file in your project’s root directory. Use below command to automatically create a requirements.txt and copy all dependencies in it.
$ pip freeze > requirements.txt
Your project dependencies should have been included in requirements.txt file as shown in image:
Step 10 – Now, Delete the db.sqlite3 file from your project directory as you will use ‘postgres’ database for your django application in next steps
Step 11 – Let’s edit ‘ALLOWED_HOST’ in settings.py file present in myproject directory as shown in image:
For now, You can set ALLOWED_HOST to ‘*’ to let the wsgi allow accepting http request from any domain but in production, this is not recommended.
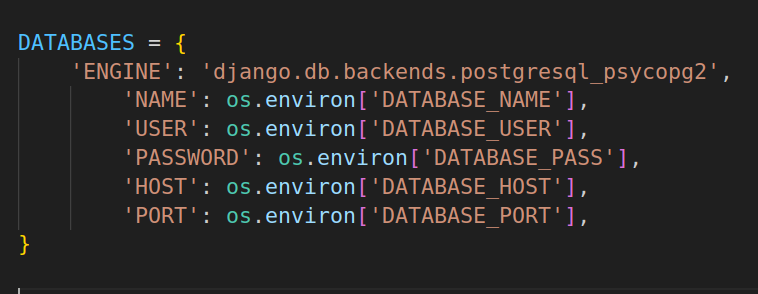
Step 12 – Let’s edit database connection settings for postgres in settings.py file of django project. First, import os module and change the following lines in settings.py file as shown in image below:
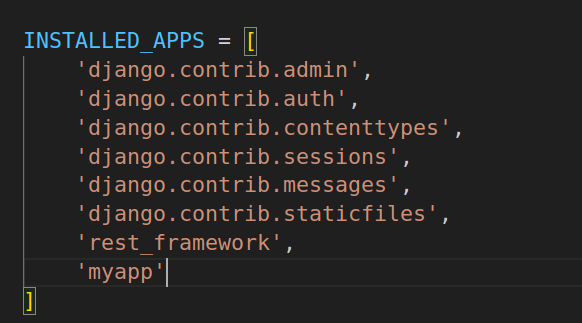
Now add rest framework and our applications in installed apps in settings.py file:
let’s edit settings.py file as shown in below image
Step 13 – Create superuser for your django application using this command:
$ python manage.py createsuperuser
Give all the credentials required:
Open postgres terminal on terminal using this command :
sudo -u postgres psql
Now create database, host,password and grant all previllages to this user on this database
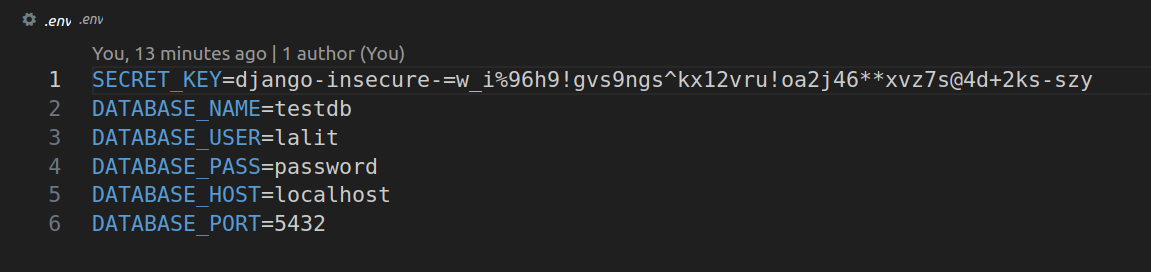
Add all these credentials along with secret key in .env file as shown below:
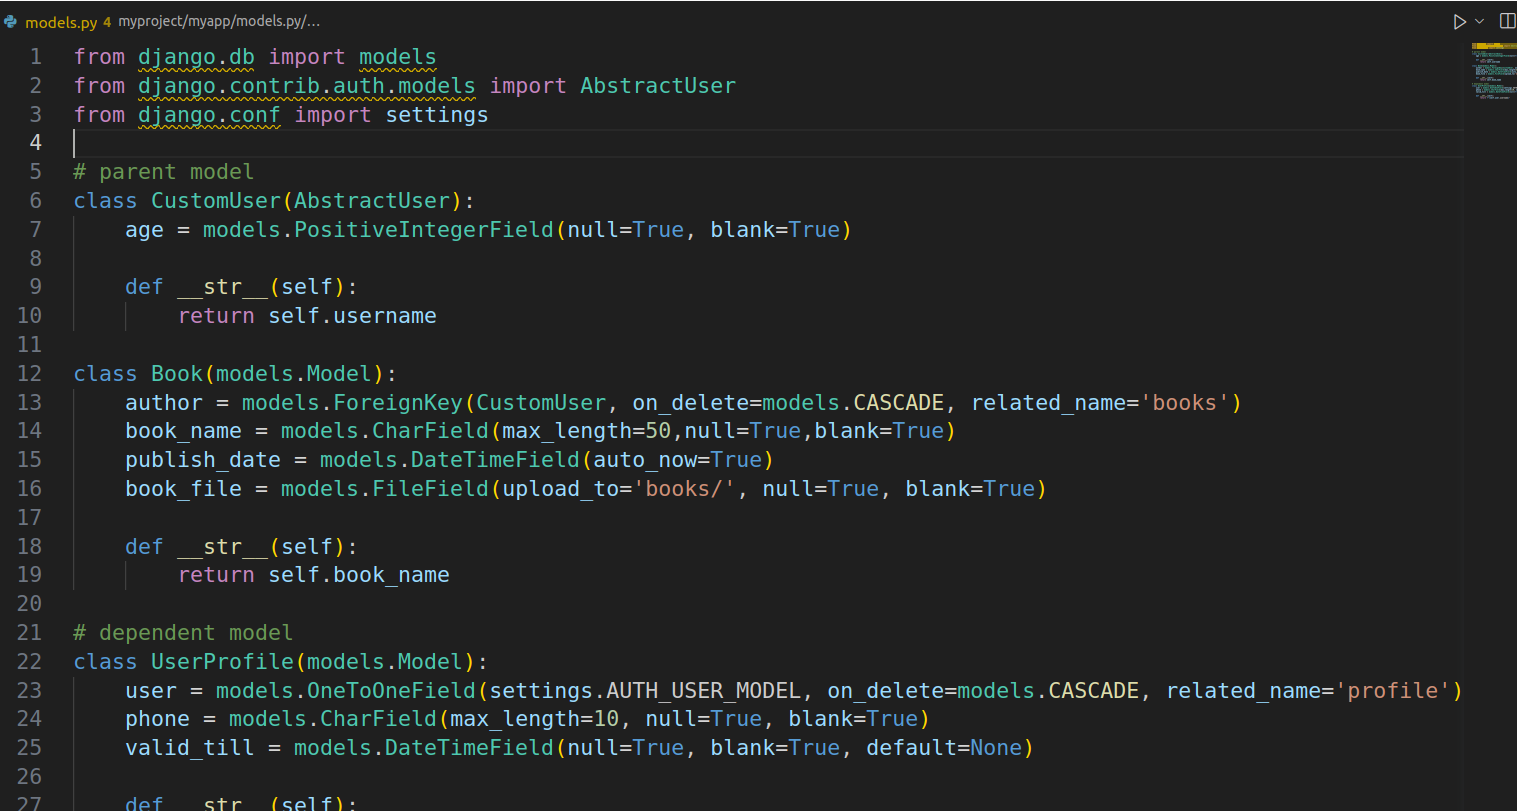
Step 14 – Now create models in model.py file present in myapp directory with desired field But one thing is we have to keep one foreign key in dependent models
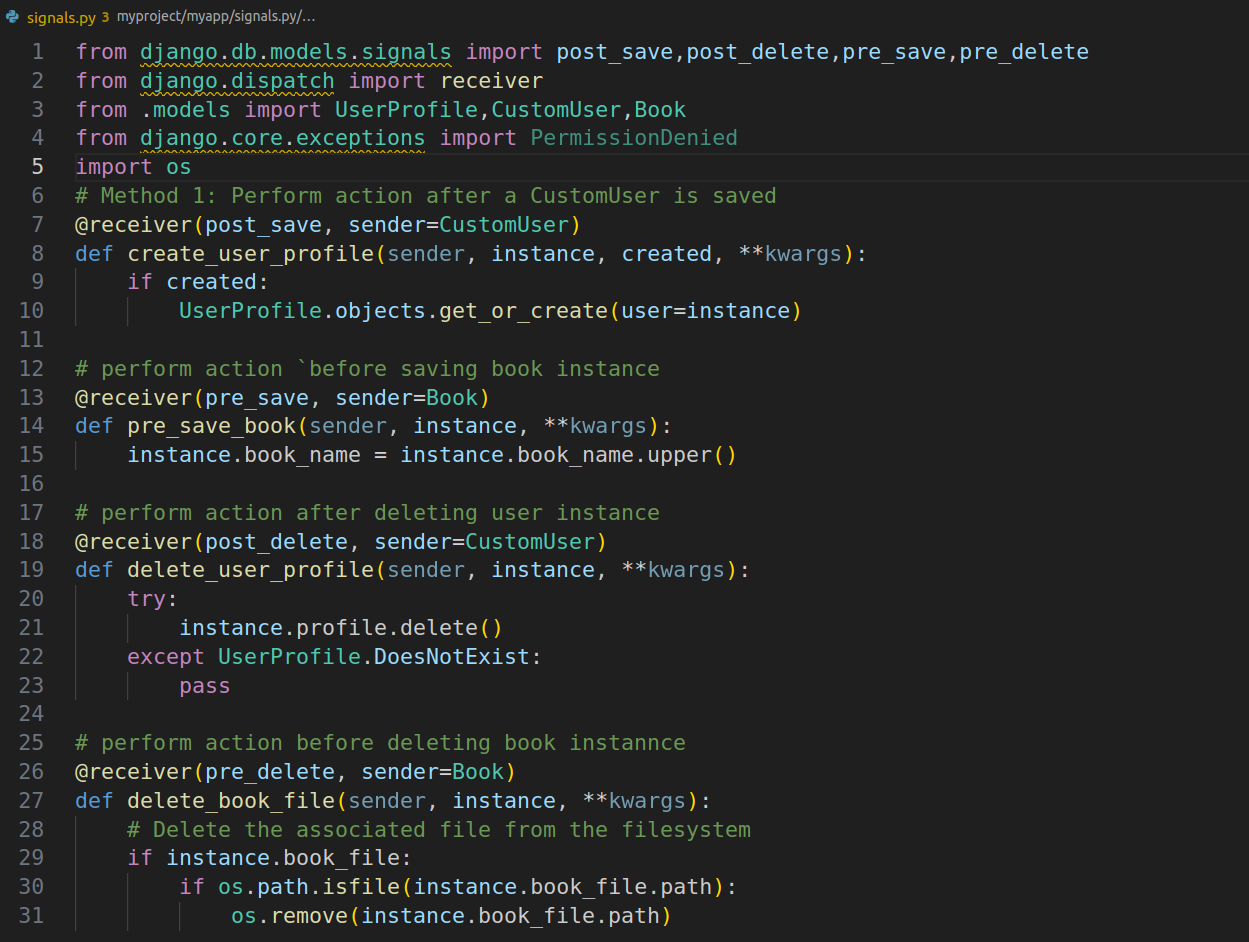
Step 15 Now add a new file with name signals.py in Application directory and add signals for creating instances of all dependent models when we create an instance of parent model as shown in image below:
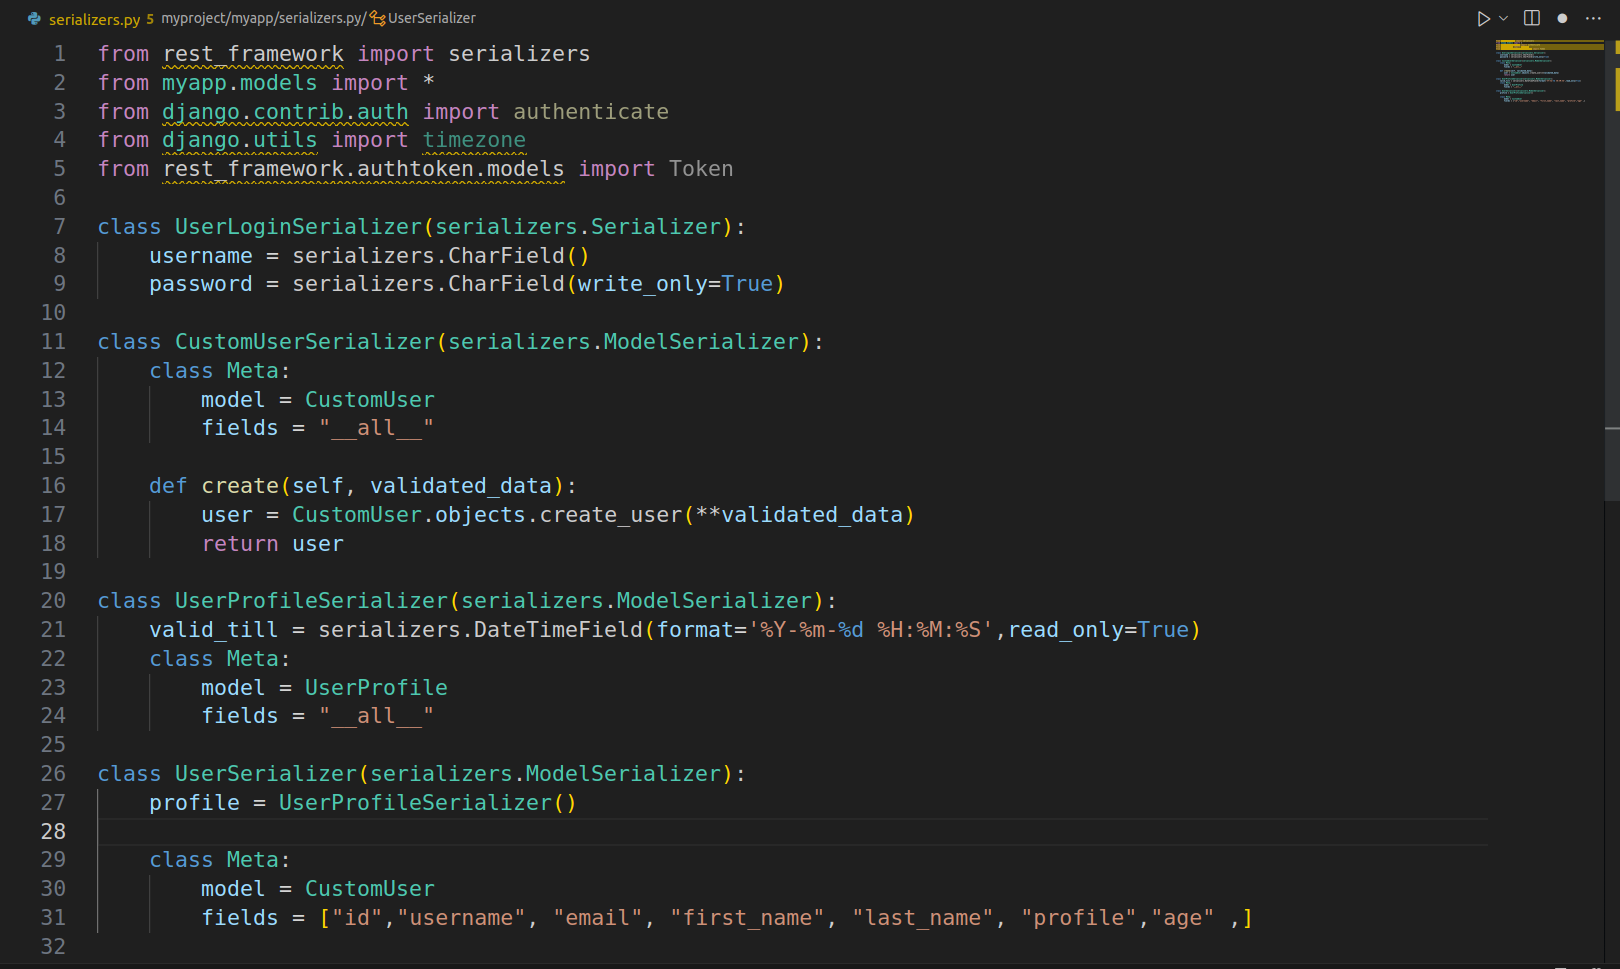
Step 16 – Let’s add a new file with name serializers.py in our application directory and create modelserializers for each model to receive post request data as shown in below image:
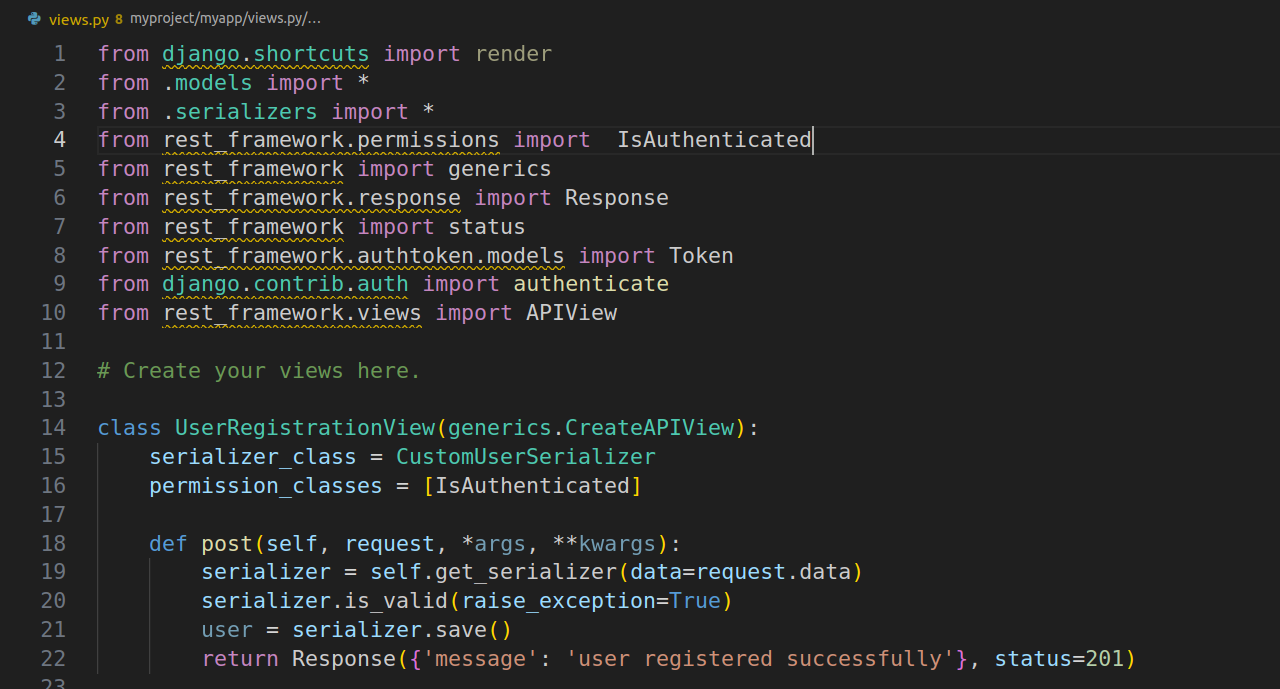
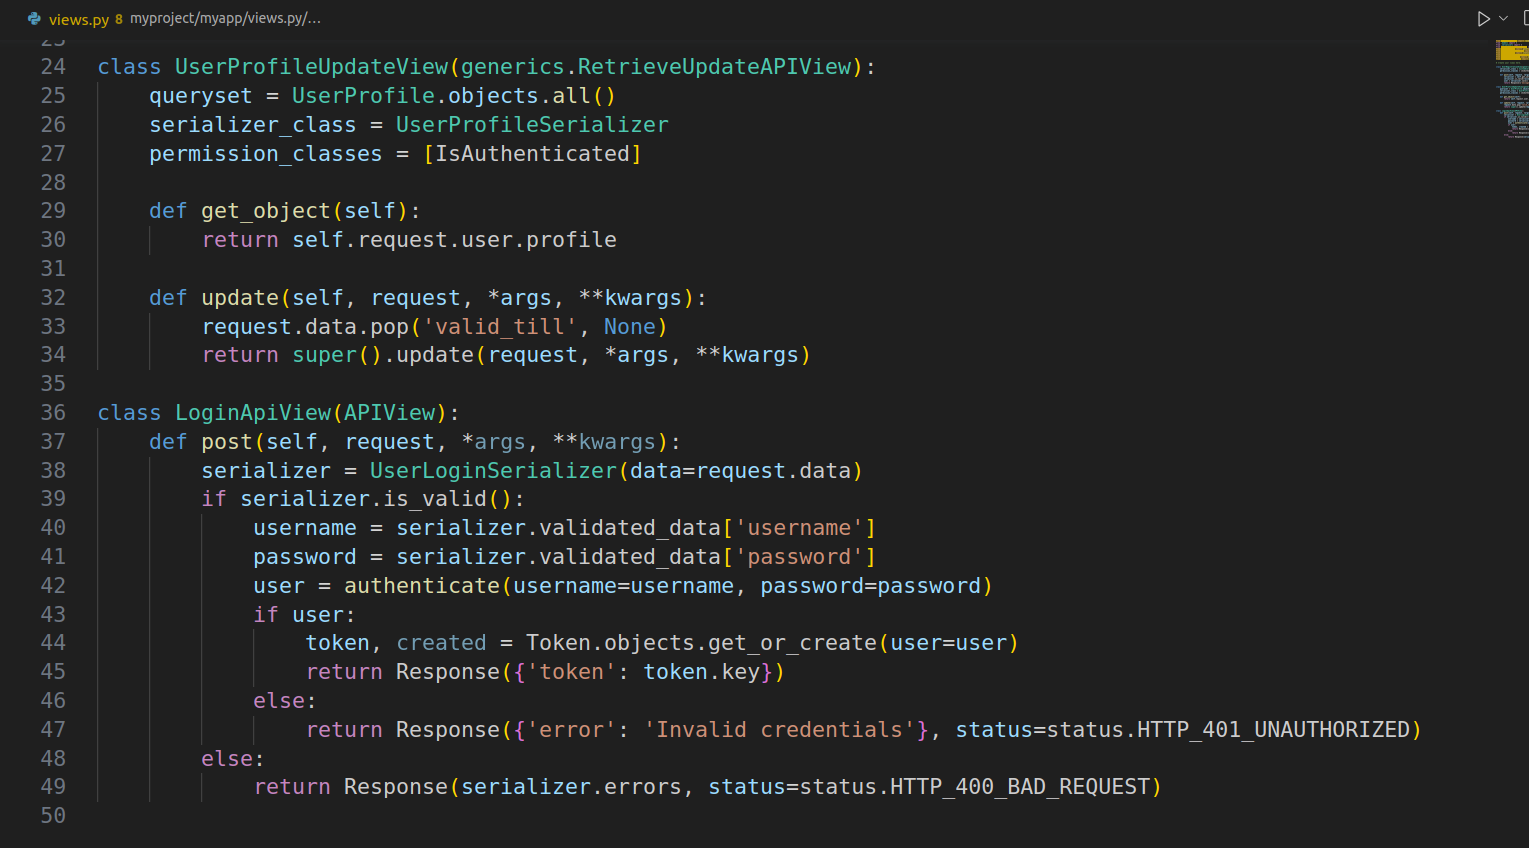
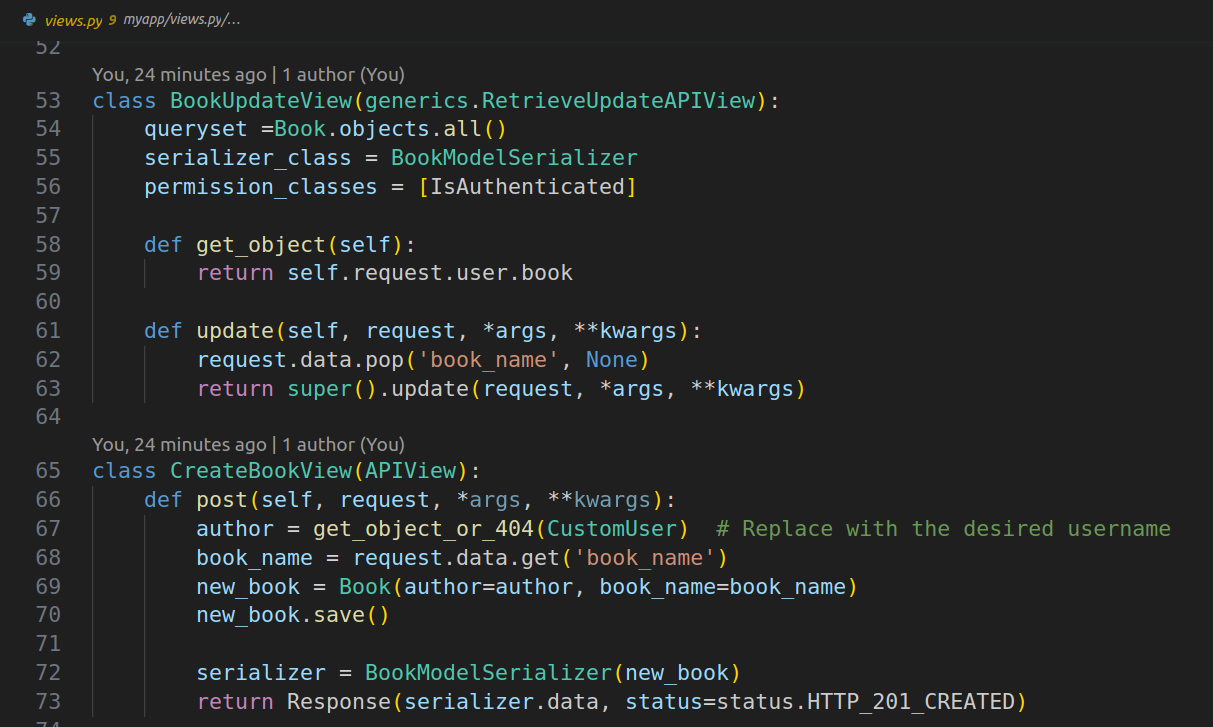
Step 17 – Create views according to your requirement.As we are using signals so we don’t need create view for dependent models so we will use only RetrieveUpdateView from generic views:
Step 18 – Add urls.py file to application directry and add url paths for each view in this file as shown below :

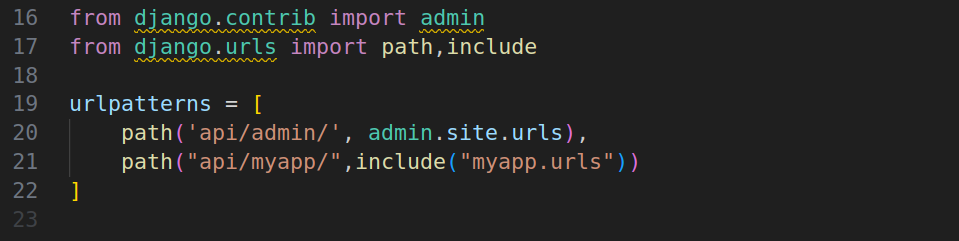
Step 19 – Include application url paths in your project urls.py file as shown in below image:
Now start you development server using command :
$ python manage.py runserver
Step 20 – Test it from Admin panel using url address http://127.0.0.1:8000/admin/.
If it’s working fine Now you can check this from postman also if you want .When we request for creating instance of parent table it will create instances for dependent models
results for all Actions
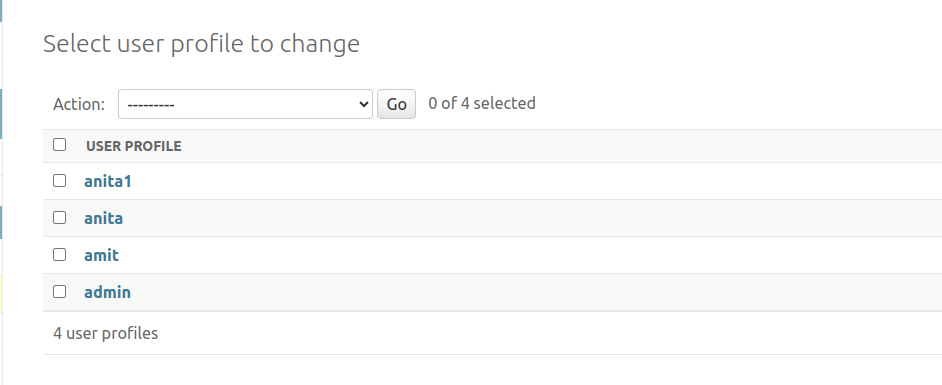
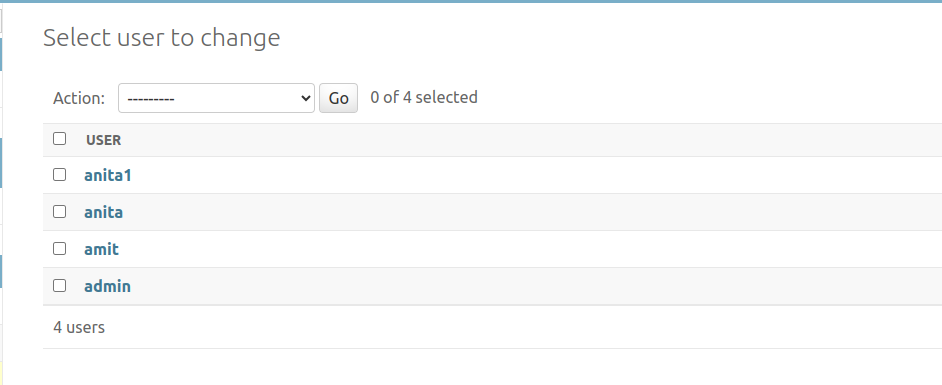
As we create a user from admin panel or postman request it will automatic create user profile by calling post save request in signals file
Same when we will delete any user it will delete user profile as well by calling post delete request in signals
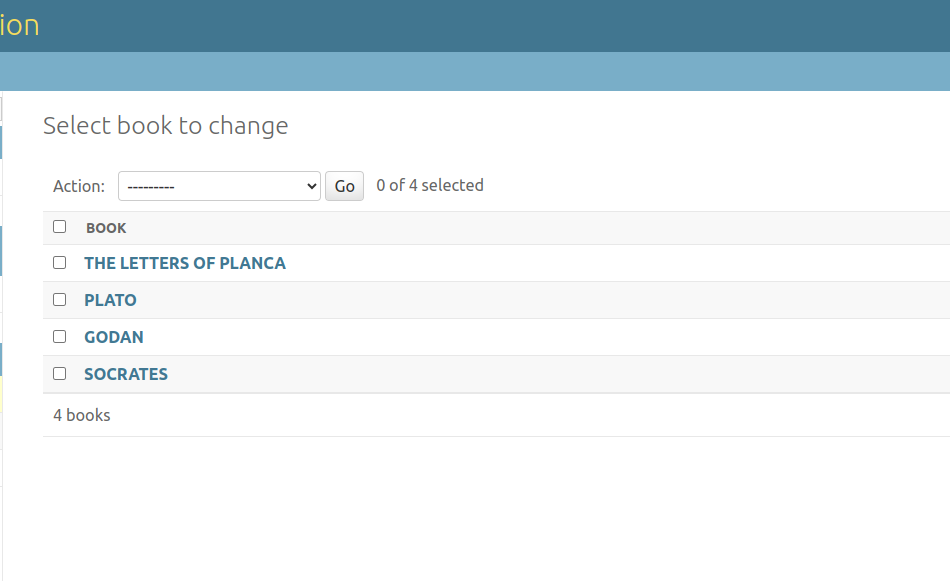
When we will create a book instance by giving book name in any format it will automatically change it to uppercase characters by calling pre save method from signals file
And Also when we will try to delete any book instance it will first remove file path from directory by calling pre delete method from signals file
We can observer pre delete method result in our project directory where we were saving file paths